GitLab + GitLab CI with DTM Apps
0 Goal
In this tutorial, we will try to achieve the following goals with DevStream:
- Use Docker to install GitLab as a code warehouse (if GitLab is already installed on your server, you can skip this step);
- Create a Python web application repository on GitLab, based on the Flask framework;
- Use GitHub CI to set up a basic CI pipeline for the warehouse we created;
- Install Argo CD in an existing Kubernetes cluster to implement GitOps;
- Create an Argo CD application to deploy the web application generated in step 1.
prerequisites:
- Docker (GitLab uses Docker for installation)
- Kubernetes cluster (Argo CD is installed in the Kubernetes cluster)
If you want to follow along with this tutorial and try it yourself, but don't know how to get a Kubernetes cluster up and running locally, the following blog (also from DevStream) might help:
1 Overview
DevStream will use the following plugins to achieve the goals described in Section 0:
- gitlab-ce-docker: used to install GitLab in Docker;
- repo-scaffolding: used to create a Python web application repository on GitLab;
- gitlab-ci: used to set up the basic CI pipeline for the warehouse we created;
- helm-installer: used to install Argo CD in a Kubernetes cluster;
- argocdapp: Used to create an Argo CD application to deploy the web application generated in step 1.
We will accomplish these goals in two steps:
- Write a configuration file to complete the installation of tools, GitLab and Argo CD;
- Write a configuration file to complete the creation of subsequent pipelines and code warehouses, and deploy them to Argo CD.
Note: In fact, the installation and configuration of DevOps tools can be completed in the same configuration file, but GitLab is special, requiring the user to manually create a token after the installation is complete, so we split the tool installation separately.
2 Getting Started: Download DevStream (dtm)
Create a test directory for this tutorial:
In the newly created directory, execute:
This script will download the corresponding dtm binary file according to your operating system and save it to the current directory. Then, give it executable permissions.
Optional: You can move
dtmto a directory in your $PATH environment variable. For example:mv dtm /usr/local/bin/. In this way, you can rundtmdirectly without prefixing it with./.For more installation methods, see Install dtm.
2 Install GitLab And Argo CD
2.1 Prepare Config
Create file config-tools.yaml. Modify vars to your values:
config:
  state:
    backend: local
    options:
      stateFile: devstream-1.state
vars:
  gitlabHostname: gitlab.example.com
  gitlabSSHPort: 30022
  gitlabHttpPort: 80
  gitlabHttpsPort: 30443
tools:
  - name: gitlab-ce-docker
    instanceID: default
    dependsOn: []
    options:
      hostname: [[ gitlabHostname ]]
      gitlabHome: /srv/gitlab
      sshPort: [[ gitlabSSHPort ]]
      httpPort: [[ gitlabHttpPort ]]
      httpsPort: [[ gitlabHttpsPort ]]
      rmDataAfterDelete: false
      imageTag: "rc"
  - name: helm-installer
    instanceID: argocd
And modify the /etc/hosts file of the server to add the domain name resolution of gitlab.example.com. If your server ip is 44.33.22.11, you can configure it like this:
2.2 Init
Run the following command to download the plugins required to install GitLab and Argo CD:
2.3 Apply
Run the following command to install GitLab and Argo CD:
You'll see similar outputs to:
2.4 Check Installation Results
2.4.1 Access GitLab
You can configure the 44.33.22.11 gitlab.example.com static domain name resolution record in your PC, and then access GitLab through http://gitlab.example.com in the browser (if the browser reports:
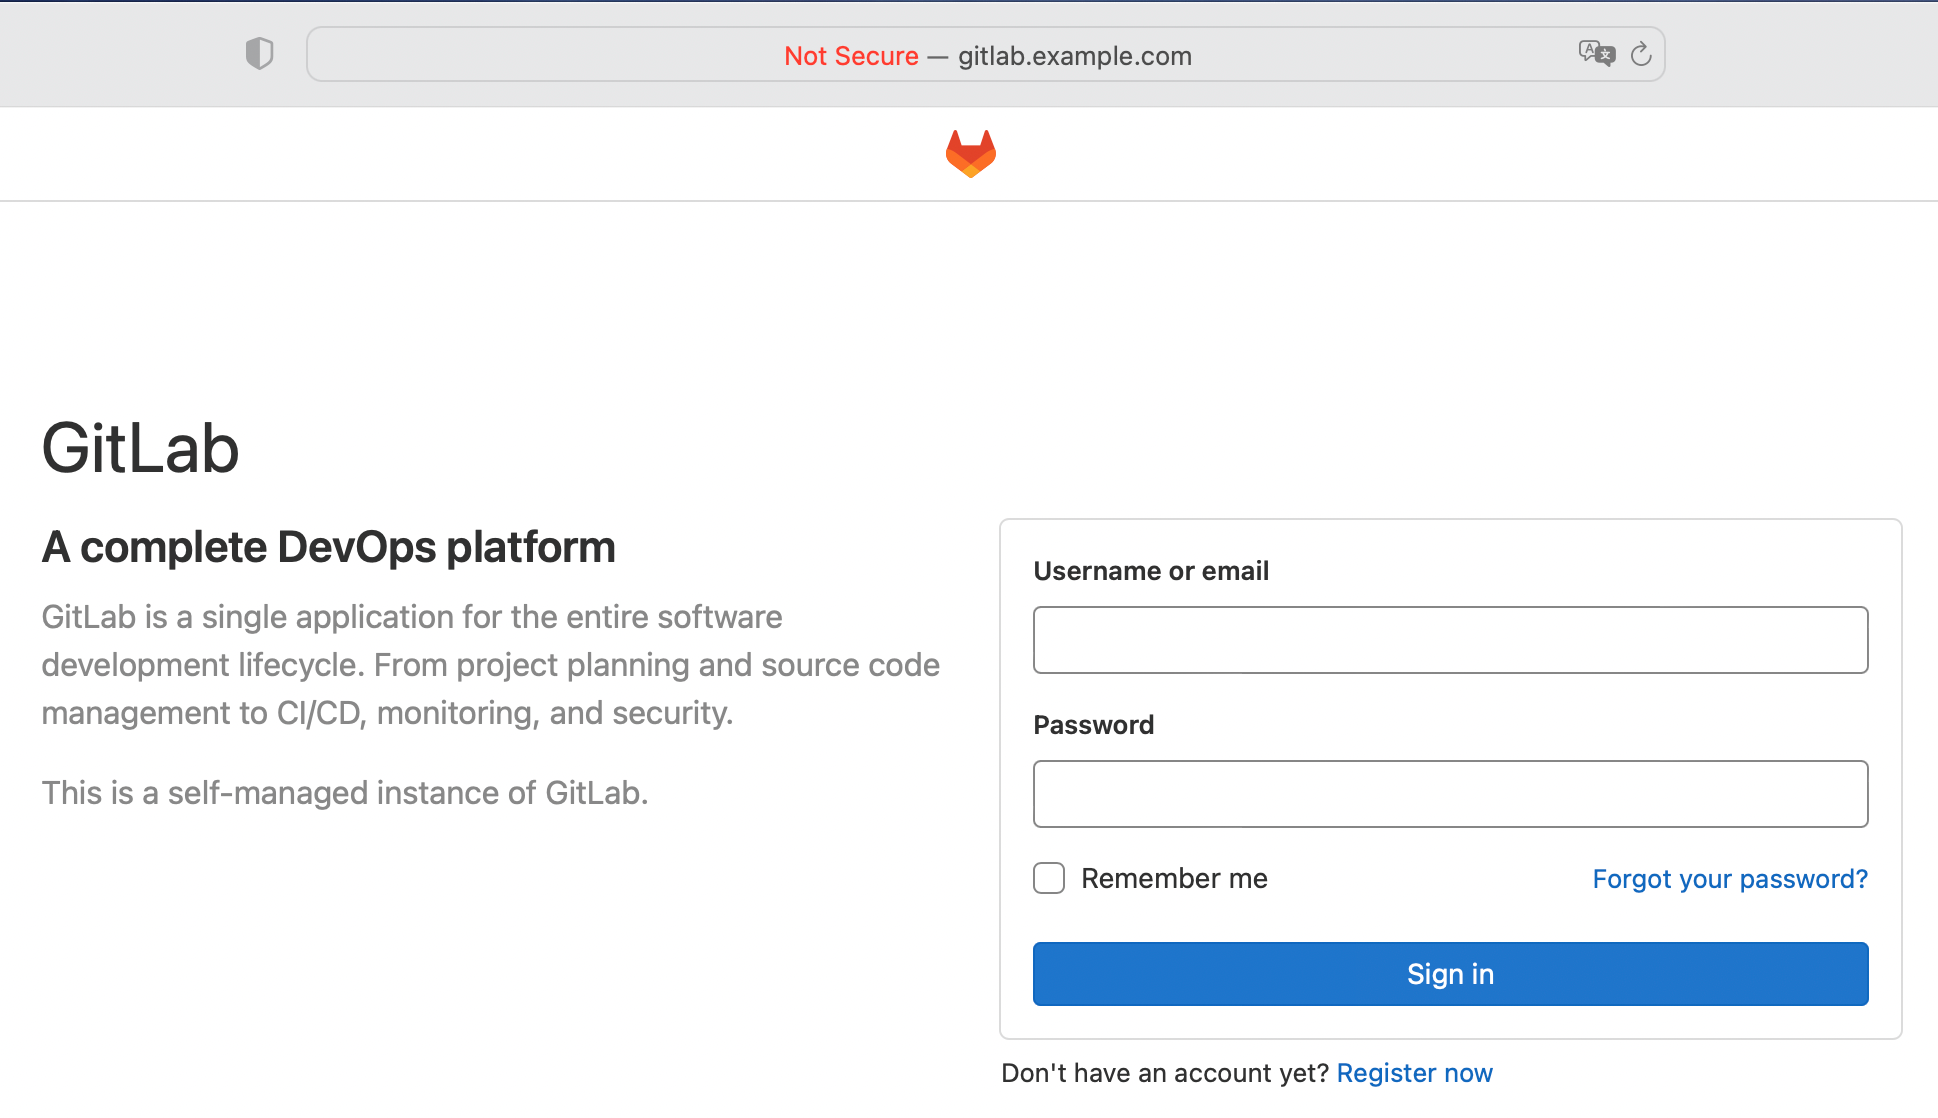
Run the following command to get GitLab's root password:
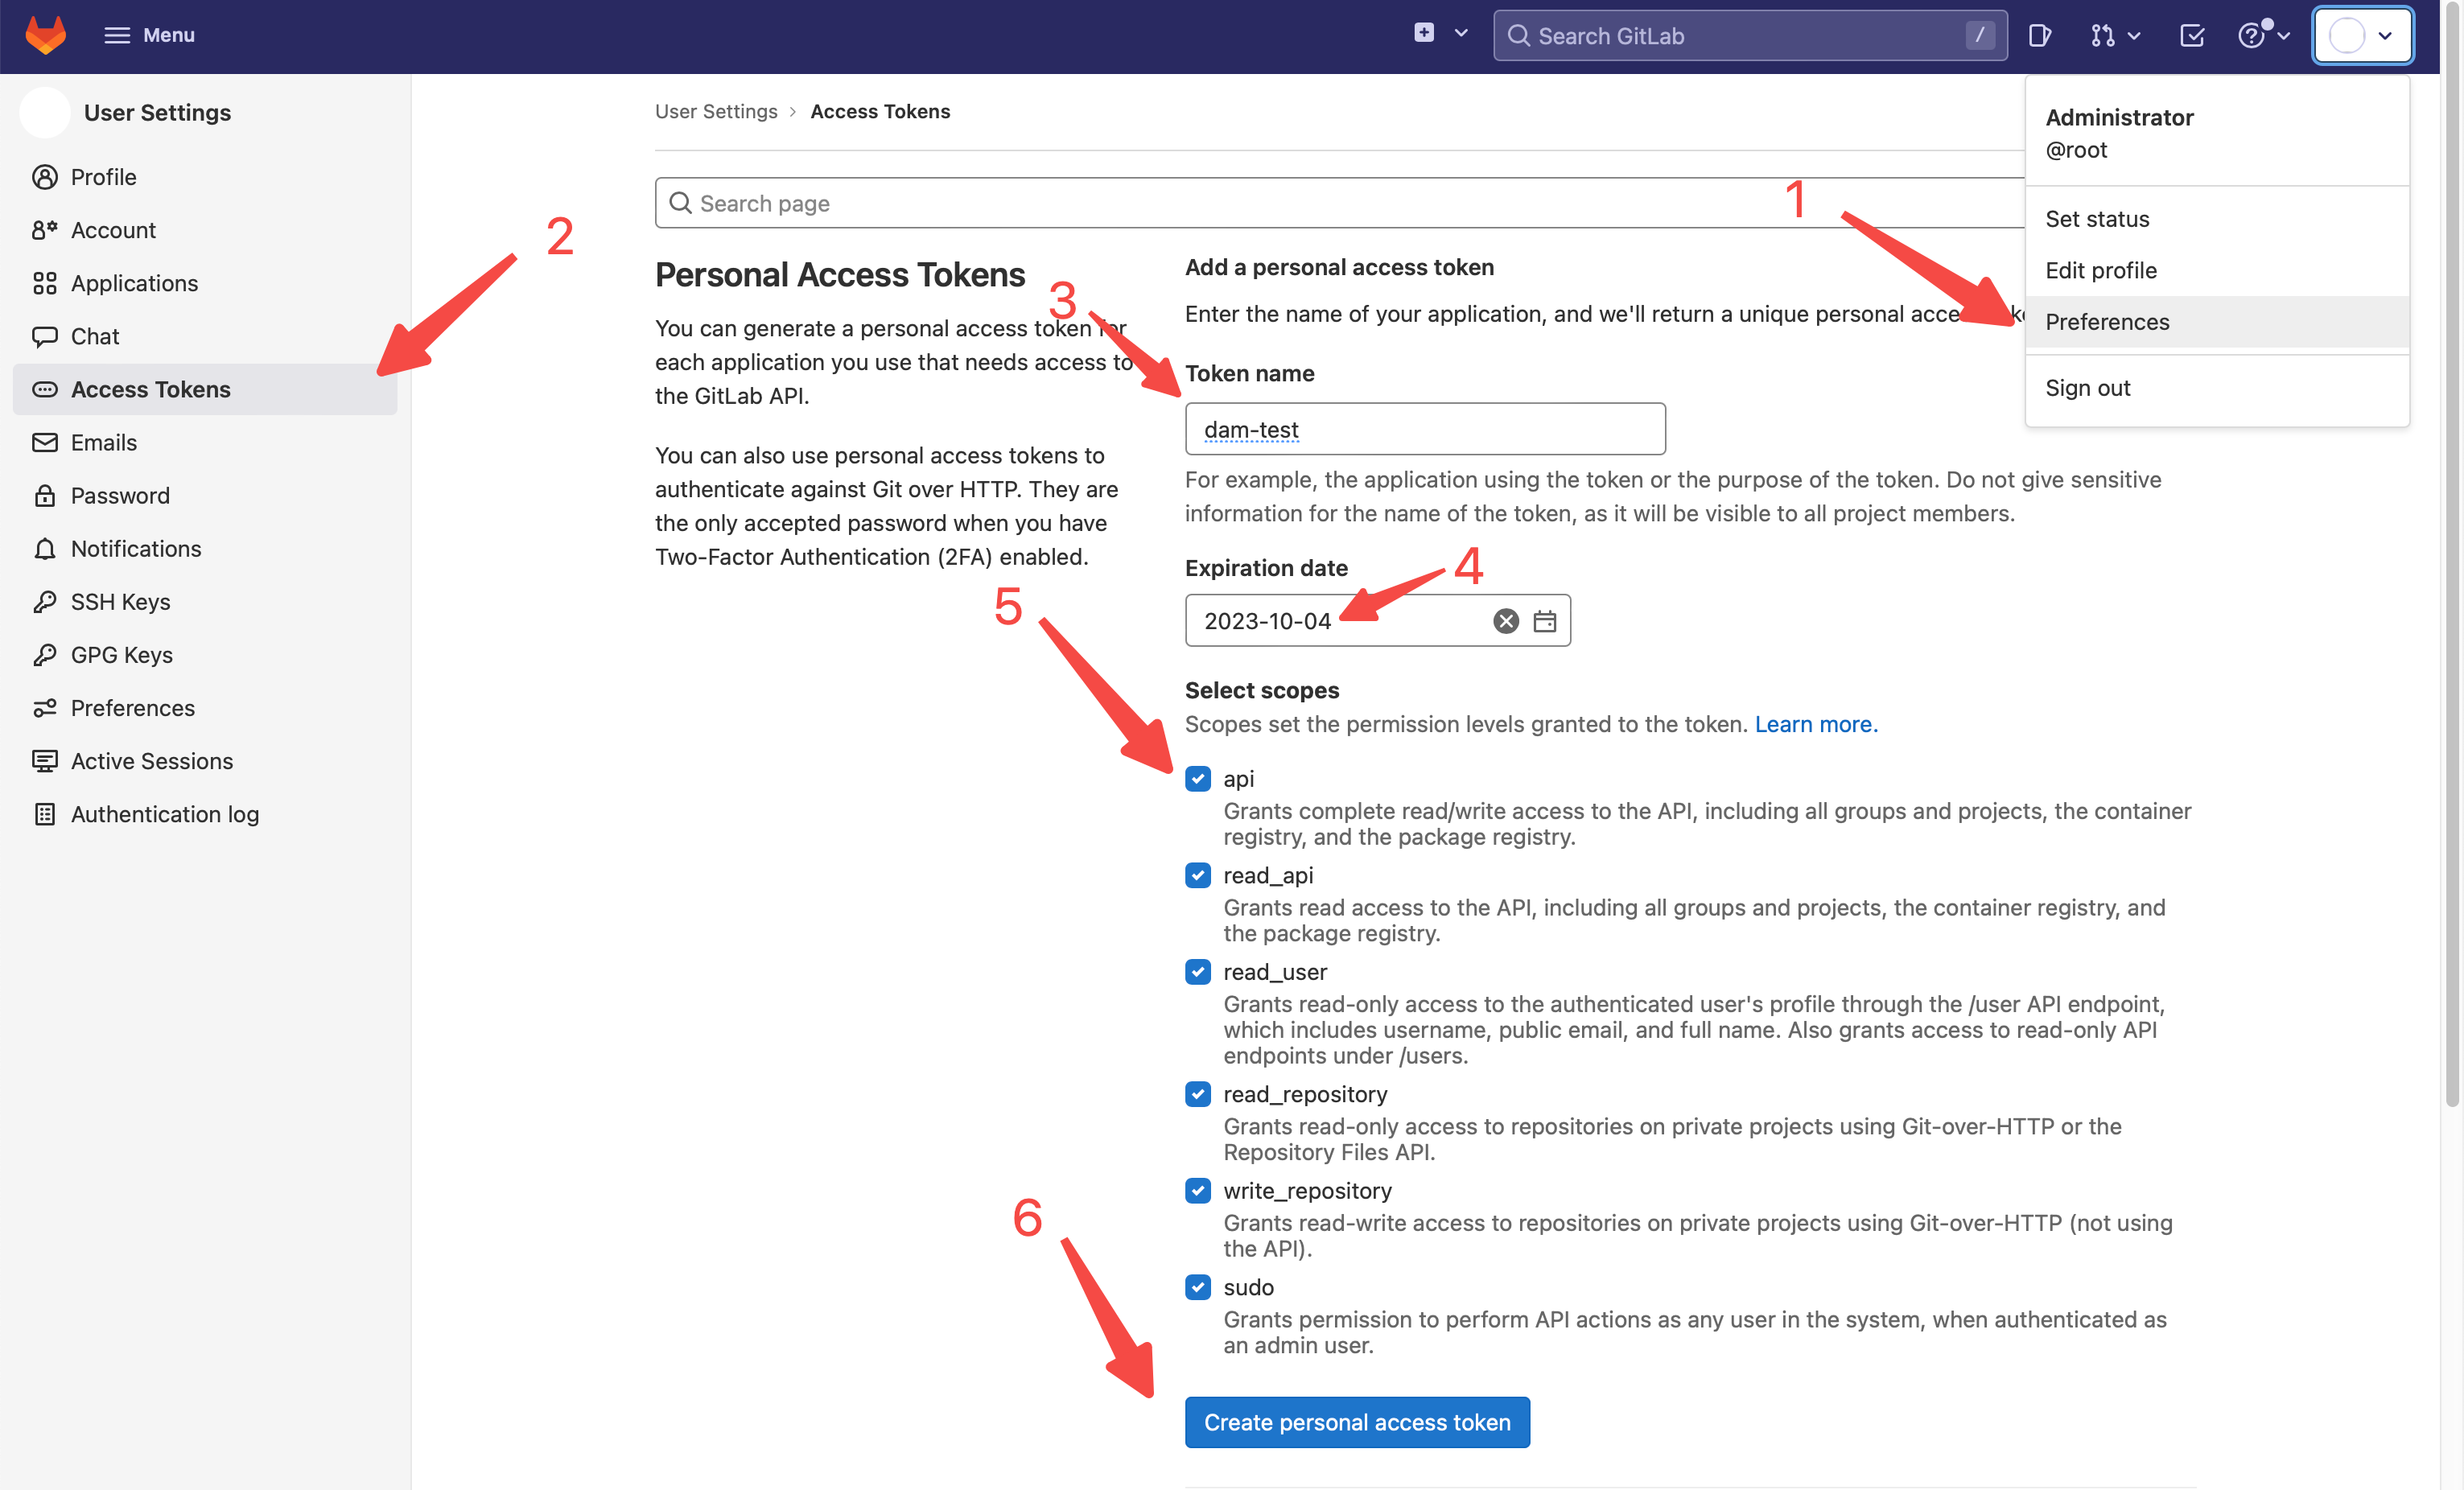
Login with root/YOUR_PASSWORD. We will use GitLab token later, so let's create one now:
2.4.2 Check Argo CD
We can see that Argo CD is installed into the argocd namespace of the Kubernetes cluster:
[root@ip-10-18-13-200 devstream]# kubectl get ns
NAME              STATUS   AGE
argocd            Active   36s
default           Active   6d4h
kube-node-lease   Active   6d4h
kube-public       Active   6d4h
kube-system       Active   6d4h
[root@ip-10-18-13-200 devstream]# kubectl get pods -n argocd
NAME                                                READY   STATUS    RESTARTS   AGE
argocd-application-controller-0                     1/1     Running   0          49s
argocd-applicationset-controller-7f4577c5fd-8z926   1/1     Running   0          49s
argocd-dex-server-7cdb45c7c9-nspgz                  1/1     Running   0          49s
argocd-notifications-controller-65b77fb646-phdwh    1/1     Running   0          49s
argocd-redis-577c6c8f5c-nf5xm                       1/1     Running   0          49s
argocd-repo-server-7bd9fd899c-7f6cp                 1/1     Running   0          49s
argocd-server-6686bbcf68-fms5w                      1/1     Running   0          49s
3 Create and Deploy the App
3.1 Prepare Config
Create file config-apps.yaml. Modify vars to your values (pay extra attention to dockerhubUser):
config:
  state:
    backend: local
    options:
      stateFile: devstream-2.state
vars:
  appName: myapp
  gitlabURL: http://gitlab.example.com
  defaultBranch: main
  dockerhubUser: DOCKERHUB_USER
apps:
  - name: [[ appName ]]
    spec:
      language: python
      framework: flask
    repo:
      url: [[ gitlabURL ]]/root/[[ appName ]].git
      branch: [[ defaultBranch ]]
      token: [[ env GITLAB_TOKEN ]] # use "GITLAB_TOKEN" env var
    repoTemplate:
      url: https://github.com/devstream-io/dtm-repo-scaffolding-python-flask.git
    ci:
    - type: template
      templateName: ci-pipeline
    cd:
    - type: argocdapp
pipelineTemplates:
  - name: ci-pipeline
    type: gitlab-ci
    options:
      imageRepo:
        user: [[ dockerhubUser ]]
        password: [[ env DOCKERHUB_TOKEN ]] # use "DOCKERHUB_TOKEN" env var
You may have noticed that the above configuration has something like [[ env XXX ]], which means that we reference the "XXX" environment variable to fill the configuration. So we also need to set the following two environment variables:
Note:
If you don't know how to create a DockerHub token, you can refer to: Manage access tokens
3.2 Init
Similarly, we need to download the required plugins from the config file. Run:
3.3 Apply
Run:
And you'll get similar outputs to:
3.4 Check Results
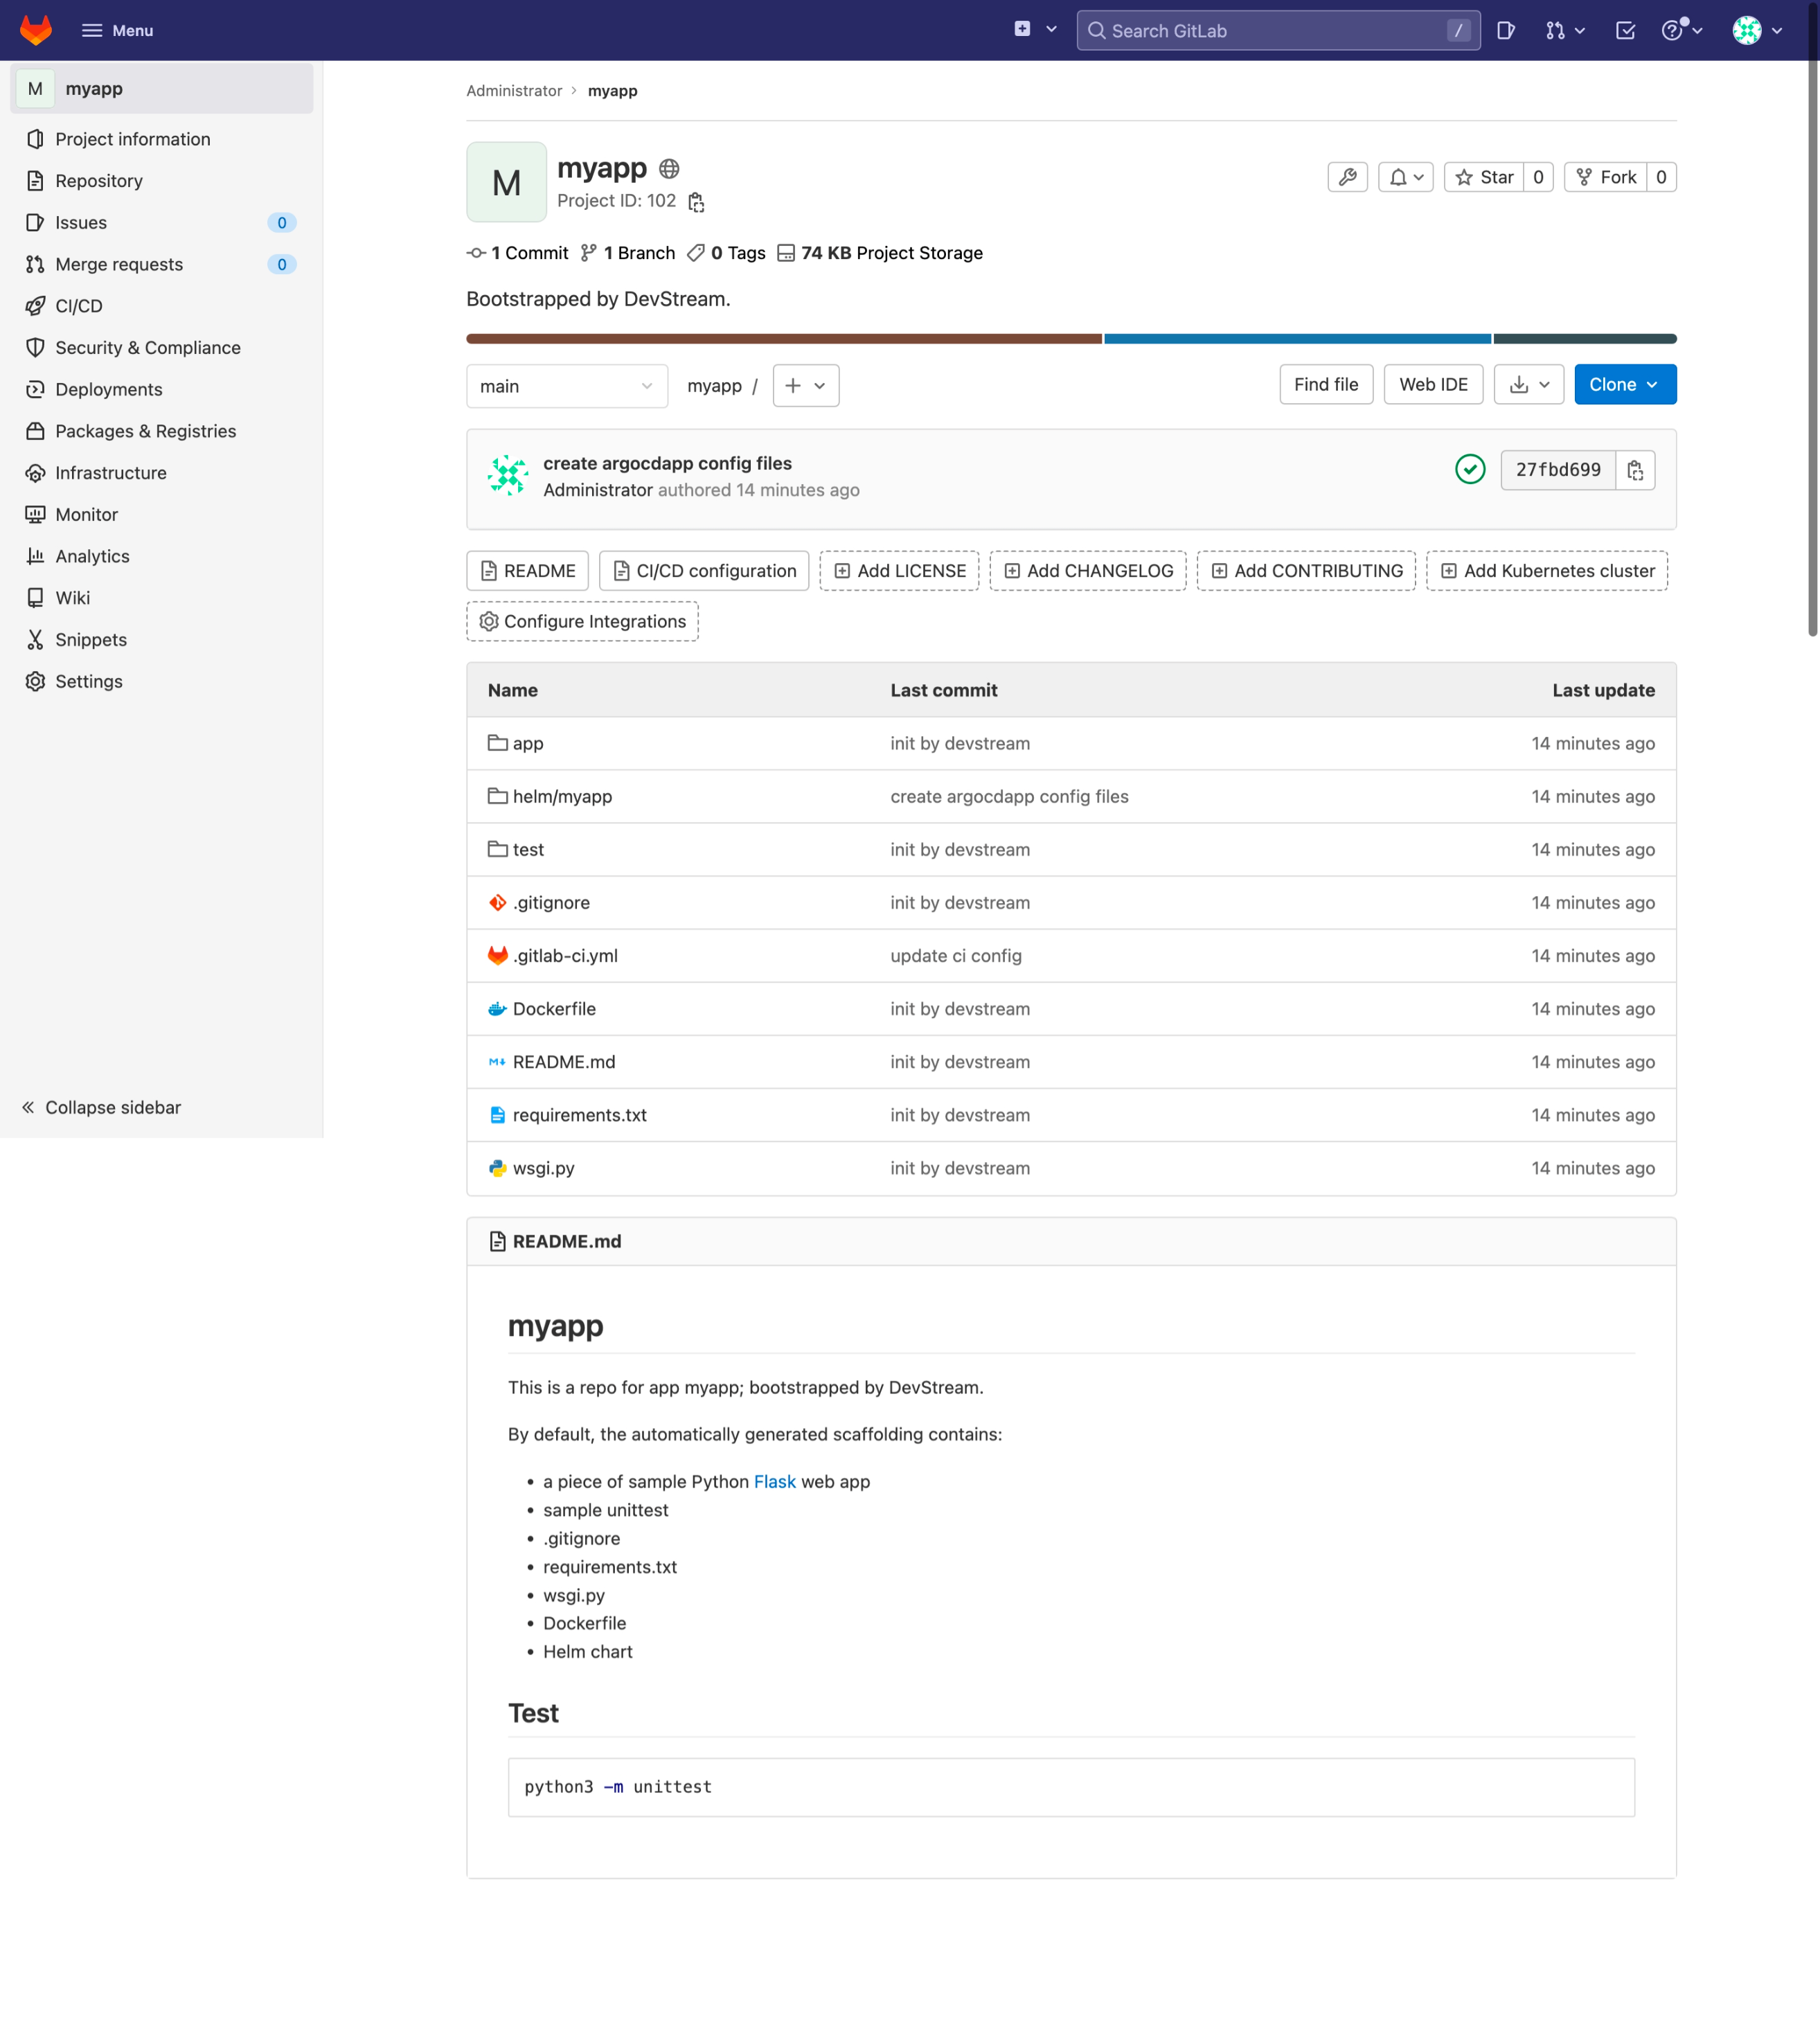
3.4.1 Check the Repo Created in GitLab
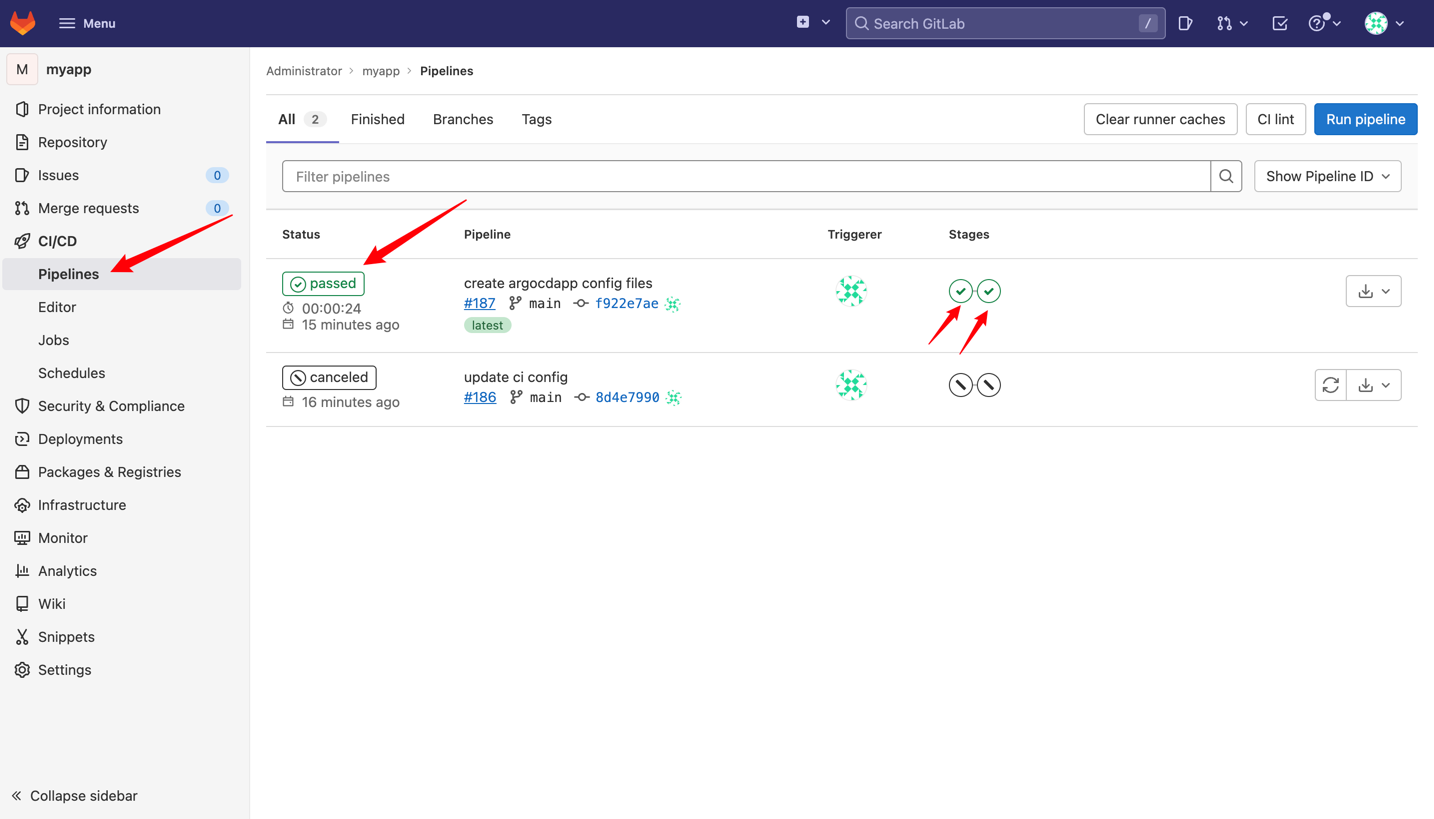
3.4.2 GitLab CI Workflow
Access http://gitlab.example.com in your browser, and click CI/CD, then Pipelines:
3.4.3 ArgoCD-Based Continuous Deployment
The CI workflow has already built a Docker image and pushed it to Dockerhub and Argo CD created by DevStream has deployed it:
[root@ip-10-18-13-200 devstream]# kubectl get deployment -n default
NAME         READY   UP-TO-DATE   AVAILABLE   AGE
myapp        1/1     1            1           101s
[root@ip-10-18-13-200 devstream]# kubectl get pods -n default
NAME                         READY   STATUS    RESTARTS   AGE
myapp-b65774f56-8cmjc        1/1     Running   0          106s
[root@ip-10-18-13-200 devstream]# kubectl get services -n default
NAME         TYPE        CLUSTER-IP       EXTERNAL-IP   PORT(S)    AGE
kubernetes   ClusterIP   10.96.0.1        <none>        443/TCP    12d
myapp        ClusterIP   10.101.148.66    <none>        8080/TCP   110s
We can access this application through port forwarding:
Visit localhost:8080 in your browser, and you can see that the application returns a "Hello, World!". You're done!
4 Clean-Up
4.1 Delete the Web App
Run
4.2 Delete GitLab and Argo CD
Run