GitOps
0 Goal
In this tutorial, we will try to use DevStream to achieve the following:
- create a new repository for a Python web application written with Flask;
- setup basic CI pipelines for the repo we created with GitHub Actions;
- install Argo CD for GitOps in an existing Kubernetes cluster;
- create an Argo CD application that deploys the web application generated in step 1.
Note:
in step 3, Argo CD is installed in an existing Kubernetes cluster. Setting up infrastructure like a Kubernetes cluster is something DevStream chooses not to do.
If you want to follow this tutorial and give it a try yourself but don't know how to get a Kubernetes cluster up and running locally, maybe the following blogs (also from DevStream) would help:
1 TL;DR: See It in Action
If you prefer to see this GitOps doc in action, check out the video demo below:
It's from an older version of DevStream with slightly different configuration files, but you get the gist. We will update the video with the latest version of DevStream soon; bear with us for a little while.
For Chinese readers, watch this one:
However, if you are like us, who prefer to do things hands-on and get their hands dirty, read on, follow the steps, and have a go yourself!
2 Overview
DevStream will use the following plugins to achieve the goal described in Section 0:
However, you do not have to worry about these plugins because DevStream will manage them automatically for you.
3 Getting Started: Download DevStream (dtm)
Create a temporary working directory for this tutorial:
Then, under the newly created directory, execute the following command:
This script checks your system and downloads the corresponding dtm binary. Then the binary will be granted execution permission.
If you do an ls, you can see the binary dtm has been downloaded:
And as a test, try to execute it, and you will get similar output to the following:
tiexin@mbp ~/work/devstream-io/test $ ./dtm
DevStream is an open-source DevOps toolchain manager

######                 #####
#     # ###### #    # #     # ##### #####  ######   ##   #    #
#     # #      #    # #         #   #    # #       #  #  ##  ##
#     # #####  #    #  #####    #   #    # #####  #    # # ## #
#     # #      #    #       #   #   #####  #      ###### #    #
#     # #       #  #  #     #   #   #   #  #      #    # #    #
######  ######   ##    #####    #   #    # ###### #    # #    #

Usage:
  dtm [command]

Available Commands:
  apply       Create or update DevOps tools according to DevStream configuration file
  completion  Generate the autocompletion script for dtm for the specified shell
  delete      Delete DevOps tools according to DevStream configuration file
  destroy     Destroy DevOps tools deployment according to DevStream configuration file & state file
  develop     Develop is used for develop a new plugin
  help        Help about any command
  init        Download needed plugins according to the config file
  list        This command only supports listing plugins now
  show        Show is used to print plugins' configuration templates or status
  upgrade     Upgrade dtm to the latest release version
  verify      Verify DevOps tools according to DevStream config file and state
  version     Print the version number of DevStream

Flags:
      --debug   debug level log
  -h, --help    help for dtm

Use "dtm [command] --help" for more information about a command.
Optional: you can move
dtmto a directory which is in your $PATH. For example:mv dtm /usr/local/bin/. This will allow you to rundtmdirectly without having to prefix it with the dot and slash (./dtm).For more methods on how to install DevStream, see install dtm.
4 Config File
Run command below to get a valid config.yaml file:
Then modify the vars section in the config.yaml file accordingly. Please update the values for githubUser and dockerUser to your real users.
In the example above, I set these vars like the following:
| Variable | Example | Note |
|---|---|---|
| githubUser | IronCore864 | case-sensitive, use your GitHub username strictly here |
| dockerUser | ironcore864 | case-sensitive, use your DockerHub username strictly here |
5 Environment Variables
The following environment variables are required for this to work:
export GITHUB_TOKEN="YOUR_GITHUB_TOKEN_HERE"
export IMAGE_REPO_PASSWORD="YOUR_DOCKERHUB_TOKEN_HERE"
Note:
if you don't know how to create these two tokens, check out:
- GITHUB_TOKEN: Manage API tokens for your Atlassian account
- IMAGE_REPO_PASSWORD: Manage access tokens
6 Init
Run:
This downloads the required plugins, according to the config file, automatically.
You'll get some outputs similar to the following:
2022-12-05 17:46:01 ℹ [INFO]  Using dir </Users/tiexin/.devstream/plugins> to store plugins.
2022-12-05 17:46:01 ℹ [INFO]  -------------------- [  repo-scaffolding-darwin-arm64_0.10.2  ] --------------------
... (omitted)
... (omitted)
2022-12-05 17:46:51 ✔ [SUCCESS]  Initialize finished.
7 Apply
Run:
You will see similar outputs as the following:
2022-12-05 17:49:49 ℹ [INFO]  Apply started.
2022-12-05 17:49:49 ℹ [INFO]  Using local backend. State file: devstream.state.
2022-12-05 17:49:49 ℹ [INFO]  Tool (repo-scaffolding/myapp) found in config but doesn't exist in the state, will be created.
2022-12-05 17:49:49 ℹ [INFO]  Tool (helm-installer/argocd) found in config but doesn't exist in the state, will be created.
2022-12-05 17:49:49 ℹ [INFO]  Tool (github-actions/flask) found in config but doesn't exist in the state, will be created.
2022-12-05 17:49:49 ℹ [INFO]  Tool (argocdapp/default) found in config but doesn't exist in the state, will be created.
2022-12-05 17:49:49 ℹ [INFO]  Start executing the plan.
2022-12-05 17:49:49 ℹ [INFO]  Changes count: 4.
... (omitted)
... (omitted)
2022-12-05 17:51:51 ℹ [INFO]  -------------------- [  Processing progress: 4/4.  ] --------------------
2022-12-05 17:51:51 ℹ [INFO]  Processing: (argocdapp/default) -> Create ...
2022-12-05 17:51:52 ℹ [INFO]  application.argoproj.io/helloworld created
2022-12-05 17:51:52 ✔ [SUCCESS]  Tool (argocdapp/default) Create done.
2022-12-05 17:51:52 ℹ [INFO]  -------------------- [  Processing done.  ] --------------------
2022-12-05 17:51:52 ✔ [SUCCESS]  All plugins applied successfully.
2022-12-05 17:51:52 ✔ [SUCCESS]  Apply finished.
8 Check the Results
Let's continue to look at the results of the apply command.
8.1 Repository
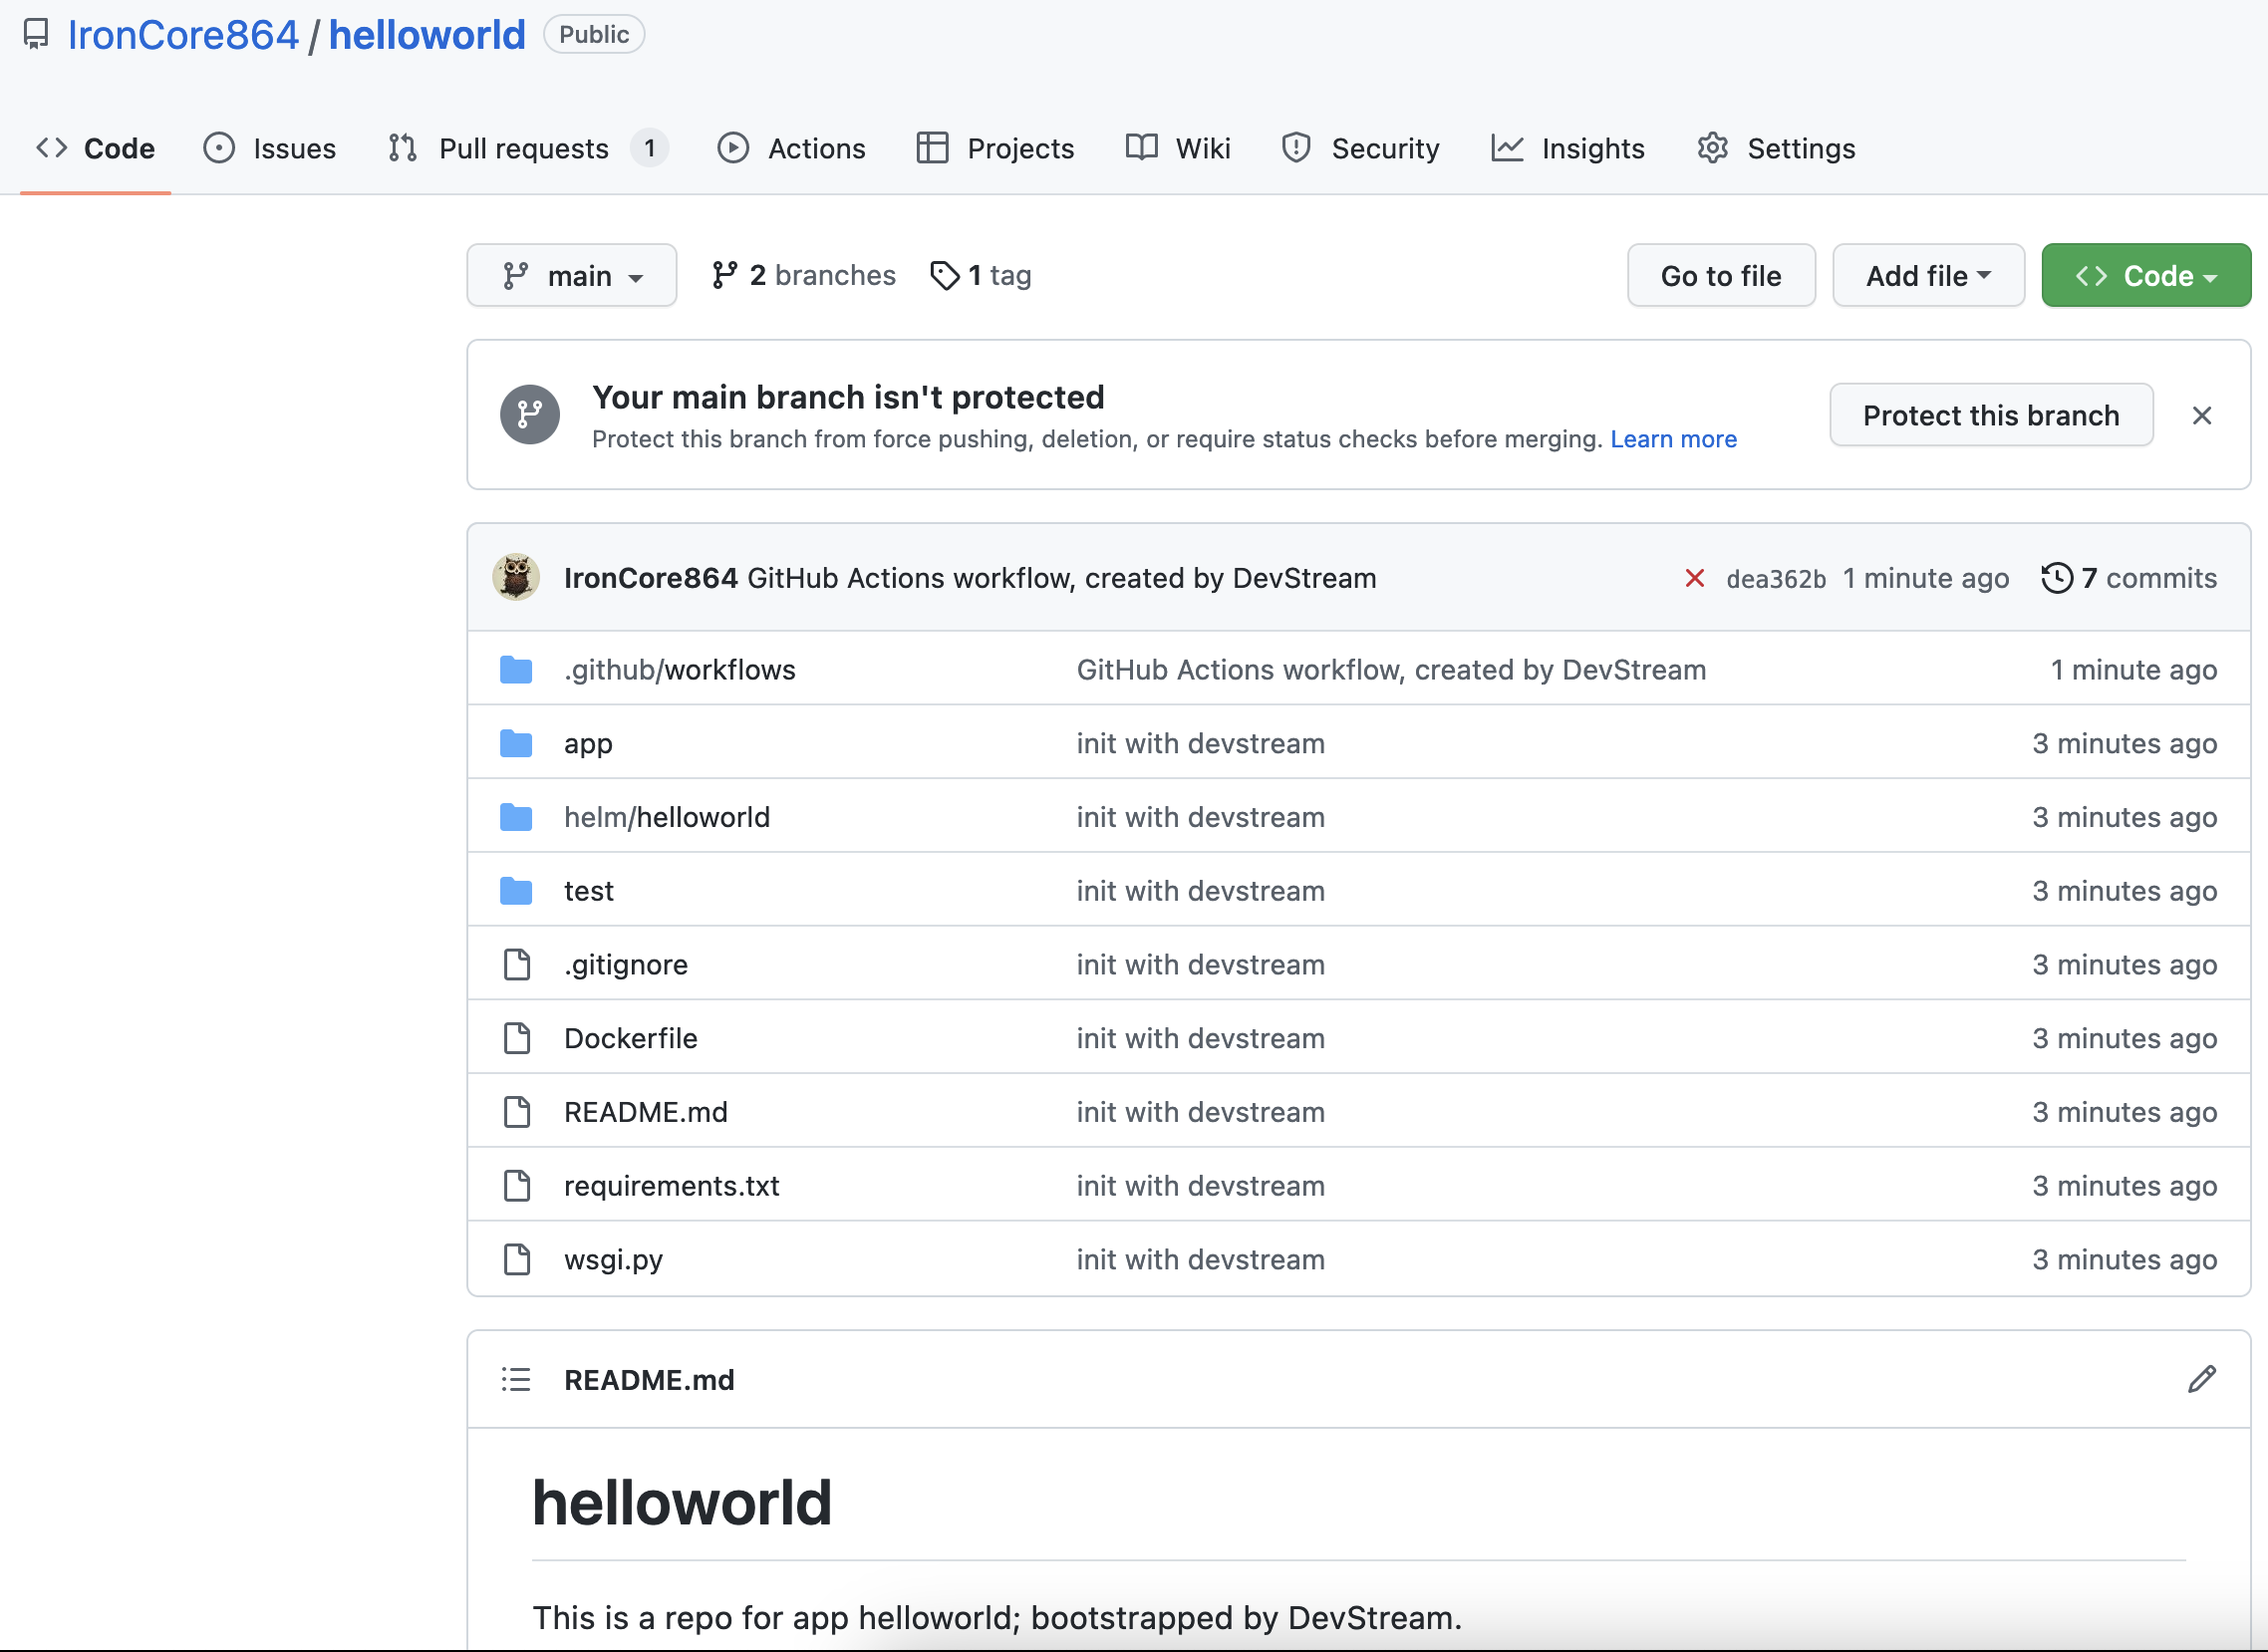
The repository is created automatically by DevStream with scaffolding code:

8.2 CI Pipelines with GitHub Actions
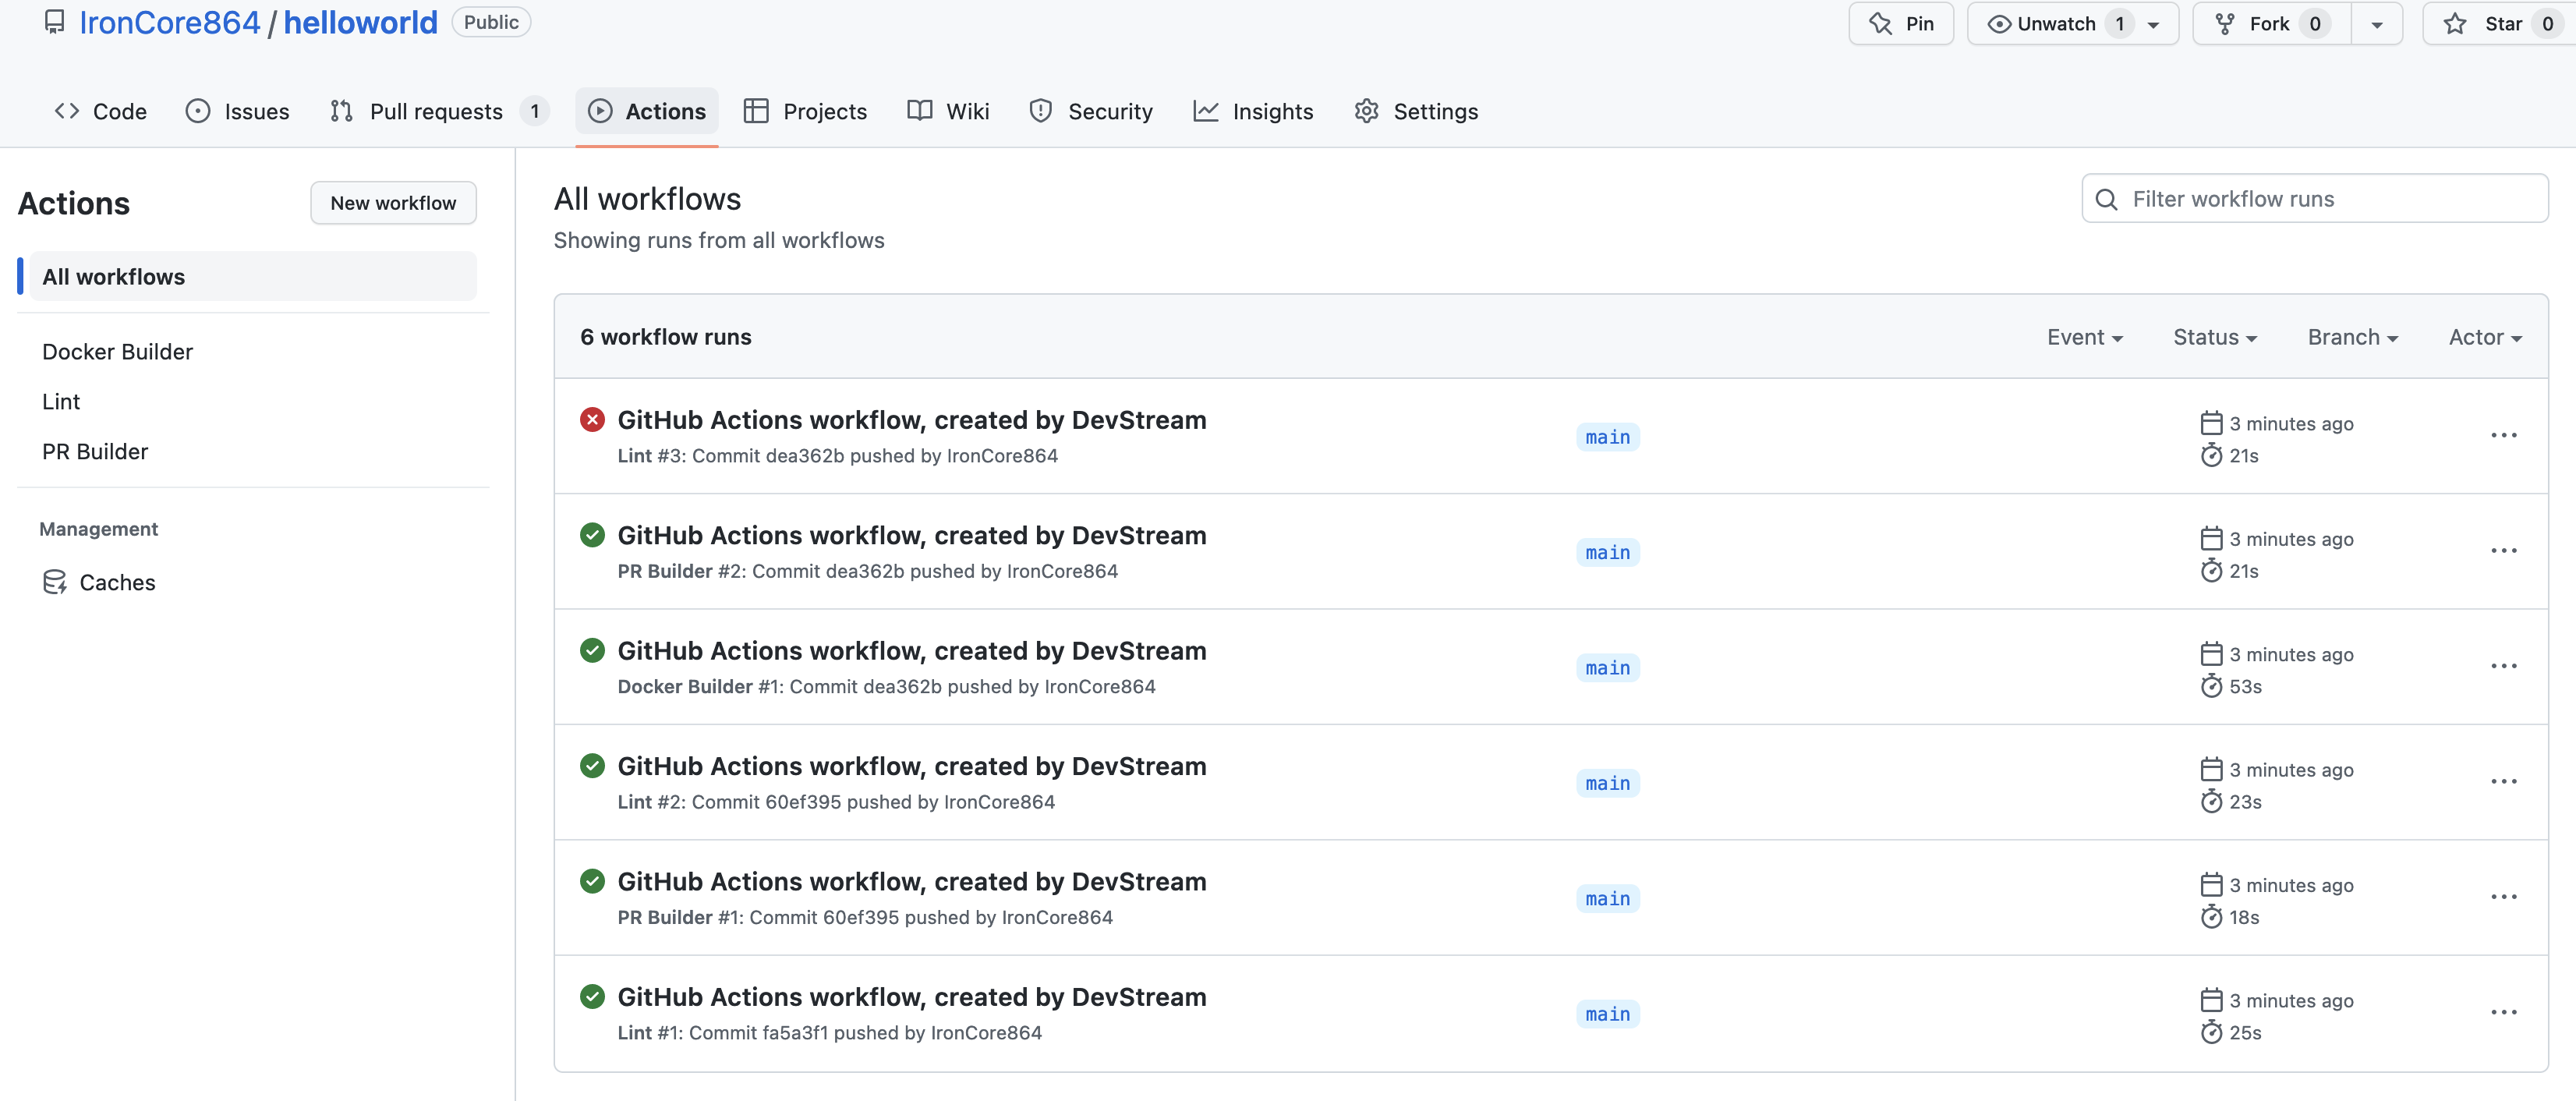
GitHub Actions pipelines are created and executed:

8.3 Argo CD Installation
Argo CD is installed in your Kubernetes cluster:
tiexin@mbp ~/work/devstream-io/test $ kubectl get namespaces
NAME                 STATUS   AGE
argocd               Active   5m42s
default              Active   6m28s
kube-node-lease      Active   6m29s
kube-public          Active   6m29s
kube-system          Active   6m29s
local-path-storage   Active   6m25s
tiexin@mbp ~/work/devstream-io/test $ kubectl get pods -n argocd
NAME                                               READY   STATUS    RESTARTS   AGE
argocd-application-controller-0                    1/1     Running   0          5m43s
argocd-applicationset-controller-66687659f-dsrtd   1/1     Running   0          5m43s
argocd-dex-server-6944757486-clshl                 1/1     Running   0          5m43s
argocd-notifications-controller-7944945879-b9878   1/1     Running   0          5m43s
argocd-redis-7887bbdbbb-xzppj                      1/1     Running   0          5m43s
argocd-repo-server-d4f5cc7cb-8gj24                 1/1     Running   0          5m43s
argocd-server-5bb75c4bd9-g948r                     1/1     Running   0          5m43s
8.4 Continuous Deployment with Argo CD
The CI pipelines build a Docker image and push it into Dockerhub, and an Argo CD application created by DevStream deploys the app already:
tiexin@mbp ~/work/devstream-io/test $ kubectl get deployment -n default
NAME         READY   UP-TO-DATE   AVAILABLE   AGE
helloworld   1/1     1            1           5m16s
tiexin@mbp ~/work/devstream-io/test $ kubectl get pods -n default
NAME                          READY   STATUS    RESTARTS   AGE
helloworld-69b5586b94-wjwd9   1/1     Running   0          5m18s
tiexin@mbp ~/work/devstream-io/test $ kubectl get services -n default
NAME         TYPE        CLUSTER-IP    EXTERNAL-IP   PORT(S)   AGE
helloworld   ClusterIP   10.96.73.97   <none>        80/TCP    5m27s
kubernetes   ClusterIP   10.96.0.1     <none>        443/TCP   8m2s
If you do a port-forwarding:
And accesses localhost:8080 in your browser, you can see the deployed app return a "Hello, World!" to you. Hooray!
9 Clean Up
Run:
And you will get similar outputs to the following:
2022-12-05 17:59:25 ℹ [INFO]  Delete started.
2022-12-05 17:59:26 ℹ [INFO]  Using local backend. State file: devstream.state.
2022-12-05 17:59:26 ℹ [INFO]  Tool (argocdapp/default) will be deleted.
2022-12-05 17:59:26 ℹ [INFO]  Tool (github-actions/flask) will be deleted.
2022-12-05 17:59:26 ℹ [INFO]  Tool (repo-scaffolding/myapp) will be deleted.
2022-12-05 17:59:26 ℹ [INFO]  Tool (helm-installer/argocd) will be deleted.
2022-12-05 17:59:26 ℹ [INFO]  Start executing the plan.
2022-12-05 17:59:26 ℹ [INFO]  Changes count: 4.
... (omitted)
... (omitted)
2022-12-05 17:59:35 ℹ [INFO]  -------------------- [  Processing done.  ] --------------------
2022-12-05 17:59:35 ✔ [SUCCESS]  All plugins deleted successfully.
2022-12-05 17:59:35 ✔ [SUCCESS]  Delete finished.
Then you can delete what we created: